Nikon WT-3 User Manual
Browse online or download User Manual for Routers Nikon WT-3. Nikon WT-3 User's Manual
- Page / 65
- Table of contents
- TROUBLESHOOTING
- BOOKMARKS
- Wireless Transmitter 1
- For Your Safety 3
- Table of Contents 7
- Introduction 9
- System Requirements 11
- Parts of the WT-3 12
- Other Install Center Options 17
- Installing PictureProject 18
- Using the PD-10 25
- 32) for more information 25
- Choose PTP 29
- Viewing Profi le Information 35
- Press the camera 35
- Printing Pictures: Print Mode 38
- button 41
- Menu Guide 42
- Encryption 45
- Choose index 46
- Enter edit mode 48
- Highlight Address 48
- Highlight Port 51
- Return to ftp menu (1/3) 51
- Appendices 56
- Troubleshooting 59
- Glossary 60
- Specifi cations 63
Summary of Contents
EnUser’s ManualWireless TransmitterW T-3WT-3
2Supported ModesThe WT-3 connects the camera to wireless and Ethernet networks. The camera can then be controlled remotely from a computer or photogr
3System RequirementsBefore using the WT-3 or WT-3 Setup Utility CD, confi rm that your system meets the following requirements:Camera• Model: Nikon D20
4Connector coverWhen using the WA-E1, remove the antenna connector cap (햲) and connect the antenna as shown at right (햳). The WA-E1 Extended Range Ant
The WT-3 ControlsThe WT-3 is equipped with a shutter-release button, AF-ON button, and command dials for ease of use when taking photographs in tall (
6SetupFollow the steps below to prepare the WT-3 for use:Update the camera fi rmware : The WT-3 is supported from camera fi rmware A version 2.00 and B
7Installing the WT-3 Setup UtilityThe WT-3 Setup Utility is used to copy computer and printer profi les to the camera. The WT-3 Setup Utility is requi
85 Click Next.6 A license agreement will be displayed. After read-ing the agreement, select I accept the terms in the license agreement and click Nex
9Mac OS X Version 10.3 or Later1 Start the computer and log in to an account with administrator privileges.2 Insert the supplied installer CD in a CD-
107 Click Install.9 Click OK and remove the WT-3 Setup Utility CD from the CD-ROM drive. If prompted to restart the computer, follow the on-screen
11Copying Network Profi les to the CameraProfi les for network computers, ftp servers, and printers can be copied to the cam-era using the WT-3 Setup Ut
Trademark InformationMacintosh and Mac OS are trademarks of Apple Computer, Inc. Microsoft and Win dows are reg is tered trade marks of Microsoft Co
123 Turn the camera on.4 Turn the computer on and start the WT-3 Setup Utility.• Windows: Double-click the WT-3 Setup Utility icon on the desktop• Ma
13 HelpClick the Help button for online help. The “Select Action” DialogThe other options in the “Select Action” dialog are described below. Note tha
148 Choose from the following options. • Automatic setup (recommended): If more than one network adapter is available, choose an adapter from the pul
15 Ad-hoc Wireless NetworksAd-hoc mode uses IP addresses beginning with 169.254. If the computer later becomes part of an infrastructure network, it
16 MAC Address FilteringIf the network using MAC address fi ltering, the fi lter must be supplied with the MAC address of the WT-3. After attaching the
17Creating a Printer Profi leThe default printer for computer profi les ( 13) is the system printer for the host computer. To choose a diff erent print
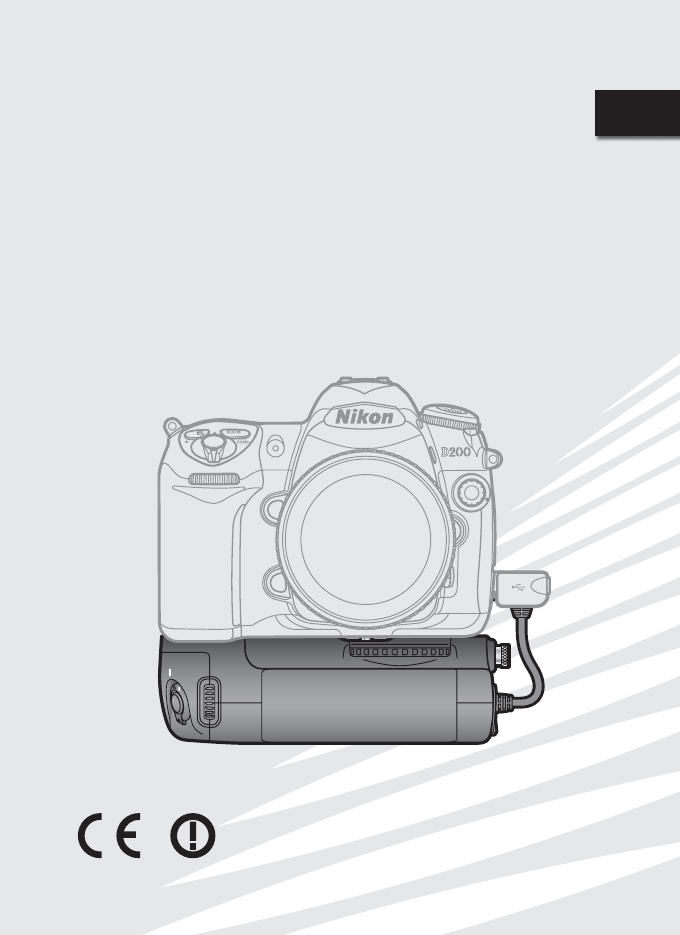
18Connecting the WT-32 Remove the power connector cover from the WT-3 and attach it to the camera strap or store it in a safe place. Be sure to repla
19 PB-6 BellowsA PK-13 auto-extension ring and a PB-6D spacer are required when using PB-6 bellows with the WT-3. Disconnecting the WT-3To disconnect
203 Insert the battery as shown on the inside of the battery chamber cover. The battery latch will slide aside during insertion and pop up to lock th
21Uploading Images: Transfer ModeChoose transfer mode to upload photographs to a computer or ftp server. The principal steps are:Upload images ...
iFor Your SafetyTo prevent damage to your Nikon product or injury to yourself or to others, read the following safety precautions in their entirety be
22 Viewing Profi le InformationPress the camera button to view information on the selected profi le.5 A list of available connection profi les will be d
23 During UploadDo not remove the memory card or disconnect the Ethernet cable during upload. File NamesIf the destination folder on an ftp server con
24Interrupting TransmissionTo cancel transmission of images marked with a white “send” icon or green “send-ing” icon, select the images during playba
25Network StatusThe status of the link between the server and the WT-3 is shown by the status LEDs and by the display in the top level of the wireless
26Controlling the Camera: PC ModeIn PC mode, a camera equipped with a WT-3 can be controlled over a wireless net-work from a computer running Nikon Ca
27 Viewing Profi le InformationPress the camera button to view information on the selected profi le.4 A list of available connection profi les will be d
28Controlling the Camera Using Nikon Capture 4 Ethernet Networks: Do Not Disconnect the Ethernet CableDo not disconnect the Ethernet cable while the c
29Network StatusThe status of the link between the server and the WT-3 is shown by the status LEDs and by the display in the top level of the wireless
30Printing Pictures: Print ModeChoose print mode to print JPEG pictures from the camera to a printer connected to a network computer or to the optiona
315 A list of available printer profi les will be displayed. Press the multi selector up or down to highlight the desired profi le, then press to the r
ii Do not expose to high temperaturesDo not leave the device in a closed vehicle under the sun or in other areas subject to extremely high temperature
32Printing Pictures Using the PD-10 Wireless Printer AdapterThe optional PD-10 wireless printer adapter allows photographs to be printed di-rectly fro
335 Select Printer registration. Note that printer registration will not be available if the camera al-ready contains nine profi les; if necessary, d
34This section describes the settings available for the Wireless transmitter option in the camera setup menu when the WT-3 is connected.Menu GuideWir
35FTP Registration (for Connection to ftp Servers Only)In transfer mode, ftp profi les can be created without using the WT-3 Setup Utility. See the Ap
36Wireless Menu, Page 1/2SSID: A BSS- or ESS-ID is required for connection to a wireless LAN adapter or access point. To change the BSS- or ESS-ID, h
37Encryption1Highlight encryption method.2Return to wireless menu (2/2).3Highlight encryption key. Skip Steps 3–5 if No encryption was selected in St
381Choose index.2Return to wireless menu (1/2).Key index: In infrastructure networks that use WEP encryption, choose the key index used by the host or
391Highlight Address.2Enter edit mode.5Highlight Mask.6Enter edit mode.4Exit to TCP / IP menu (1/2). If subnet mask is required, proceed to Step 5.3P
40TCP / IP Menu, Page 2/2Use gateway: Highlight this option and press the multi selector right to toggle it on (✔) or off . If the network requires a
41Enable DNS: Highlight this option and press the multi selector right to toggle it on (✔) or off . If a Domain Name Server (DNS) exists on the networ
iiiFCC Radio Frequency Interference StatementThis equipment has been tested and found to comply with the limits for a Class B digital device, pursuant
42FTP Menu, Page 1/3Server1Highlight Address.2Display text entry dialog.5Highlight Folder.6Display text entry dialog.FTPAdjust ftp settings as describ
4310Enter edit mode.9Highlight Port.PASV mode: Highlight this option and press the multi selector right to toggle PASV mode on (✔) or off . Turn this
44FTP Menu, Page 2/3Anonymous login: Highlight this option and press the multi se-lector right to toggle it on (✔) or off . Turn this option on for an
45FTP Menu, Page 3/3Use proxy server: Highlight this option and press the multi selec-tor right to toggle it on (✔) or off . If a proxy server is requ
46Settings (Transfer Mode Only)The following settings are available in transfer mode:Auto SendChoose whether to upload photographs to the server as th
47Send FolderAll fi les in the selected folder (including those already marked as “sent”) will be uploaded in ascending order by fi le number, beginning
48AppendicesCreating ftp Profi les Using the Camera MenusIn transfer mode, the camera menus can be used to create ftp profi les in place of the WT-3 Set
494 The registration dialog shown at right will be displayed. Press the multi selector up or down to highlight an option, then press to the right to
505 If On is selected for Wireless transmitter > Wireless LAN system, a confi r-mation dialog will be displayed. Choose from the following options:
51TroubleshootingProblem Solution“POWER” LED does not light.• Confi rm that battery is inserted in WT-3 and is fully charged.• Reattach WT-3.• Insert m
ivCAUTION: This class B digital apparatus meets all requirements of the Canadian Interfer-ence Causing Equipment Regulations.ATTENTION: Cet appareil n
52GlossaryAd-hoc: Devices in an ad-hoc wireless network communicate directly (“peer to peer”), without a wireless access point.AES (Advanced Encryptio
53Infrastructure: Devices in an infrastructure network communicate via wireless access points that may be connected to an Ethernet network, allowing w
54SS-ID (Service Set ID): An SS-ID prevents interference between devices in diff erent networks by allowing communication only between devices that sha
55Specifi cationsWirelessStandards IEEE 802.11b/g (standard wireless LAN protocol), ARIB STD-T66 (standard for low power data communications systems)Co
56 Battery LifeThe number of shots that can be taken with a fully-charged EN-EL3e battery (1500 mAh) varies with the con di tion of the batteries, tem
57IndexGGateway, 15, 40, 52IIP address, 15, 38, 53Infrastructure, 2, 14, 36, 53LLAN. See Wireless LAN, EthernetLED. See Status LEDsLINK. See Status
vTable of ContentsFor Your Safety ...iNotices ...
vi
1Thank you for purchasing a WT-3 or WT-3A wireless transmitter for compatible Nikon digital cameras. The WT-3 is for use in the country of sale, the
© 2020, manymanuals.com. All rights reserved. | 5.024 s |
 Manymanuals.com
 Manymanuals.de
 Manymanuals.fr
 Manymanuals.it
 Manymanuals.pl
 Manymanuals.cz
 Manymanuals.es
 Manymanuals-pt.com
Comments to this Manuals