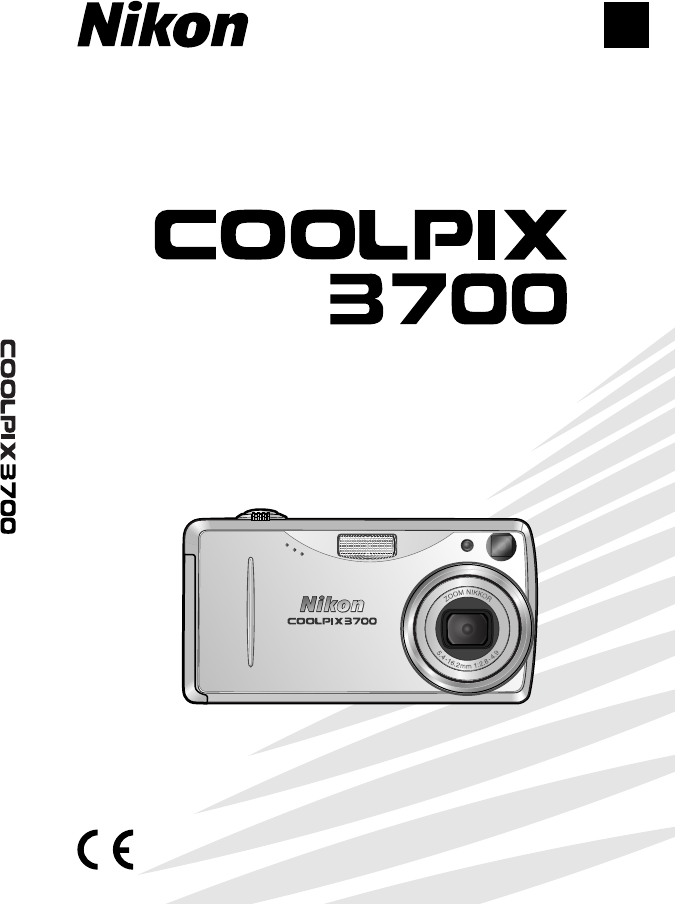
Nikon 3700 User Manual
Browse online or download User Manual for Cameras Nikon 3700. Nikon 3700 User Manual
- Page / 127
- Table of contents
- TROUBLESHOOTING
- BOOKMARKS
- DIGITAL CAMERA 1
- For Your Safety 3
- WARRANTY 7
- Table of Contents 8
- Movies 43 9
- More on Playback 52 9
- Menu Guide 69 9
- Technical Notes 102 10
- Introduction 11
- Parts of the Camera 12
- The Monitor 14
- 8/ 10 15
- The Mode Dial 16
- Navigating the Menus 16
- The Shutter-Release Button 17
- Turning the Camera on and Off 17
- First Steps 18
- Inserting Memory Cards 20
- Basic Photography 24
- Step 3 — Focus and Shoot 28
- Scene Mode 34
- More on Photography 42
- Using the Self-Timer 44
- Using Sound Release 46
- Making a Voice Recording 49
- Playing Voice Recordings 51
- Choosing a Movie Mode 53
- To select a movie mode: 54
- Recording Movies 56
- Viewing Movies 59
- Starting movie trim 60
- More on Playback 62
- Save this image 63
- Cropping Pictures 64
- 1/ 4 65
- Viewing Pictures on TV 66
- Before Connecting the Camera 67
- Choosing a USB Option 68
- Connecting the USB Cable 69
- Disconnecting the Camera 70
- Printing Pictures 71
- Print Set 72
- DPOF printing 75
- Menu Guide 79
- Image Mode ( and ) 80
- The Shooting MenuMenu Guide 81
- White Balance ( Only) 82
- WHITE BAL PRESET 83
- Continuous ( Only) 84
- Interval Timer Photography 85
- Best Shot Selector ( Only) 87
- Image Sharpening ( Only) 88
- AF Area Mode ( Only) 89
- Slide Show 91
- The Playback MenuMenu Guide 92
- Erase selected images 94
- Erase all images 94
- Deleting All Pictures 95
- Protect 96
- Auto Transfer 97
- AUTO TRANSFER 98
- Select image(s) 98
- Pic. Enhance Menu 99
- 640 x 480 100
- 320 x 240 100
- 160 x 120 100
- SMALL PIC 100
- The Setup Menu 101
- Welcome Screen 102
- Select Start Sound 103
- Time Zone 104
- The Setup MenuMenu Guide 105
- Date Imprint 106
- Brightness 107
- Sound Settings 107
- Sound Release Level 108
- Auto Off 108
- Memory Card Format 109
- Language 109
- Video Mode 109
- Reset All 110
- Firmware Version 111
- Technical Notes 112
- Caring for Your Camera 113
- Cleaning 114
- Error Messages 116
- Troubleshooting 120
- Specifi cations 123
- Printed in Japan 127
- SB3K00100401(11) 127
- 6MAA9011-A 127
Summary of Contents
En(En)The Nikon Guide to Digital Photographywith theDIGITAL CAMERA
viiiThe Setup Menu... 91 Welcome Screen...
90The Playback MenuMenu GuideSMALL PICSMALL PIC640 x 480320 x 240160 x 120 Small PictureTo create a small copy of a picture, select Small pic. after
91The Setup MenuMenu GuideThe Setup MenuThe setup menu contains the following options:Option DescriptionWelcome screen Options for camera startup. 92–
92The Setup MenuMenu GuideSelect imageSel strat soundWELCOME IMAGE SELECTWELCOME IMAGE SELECTDisable welcomeAnimationNikonSELECT IMAGESELECT IMAGE1/21
93The Setup MenuMenu Guide Small Pictures and Cropped CopiesCopies created with the small picture and cropping options can only be selected for the we
94The Setup MenuMenu Guide DateThis option is used to set the camera clock and to choose home and travel destination time zones.DateDate is used to se
95The Setup MenuMenu Guide (Travel Destination Time Zone)To set the clock to the travel destination time zone, highlight and press the center of th
96The Setup MenuMenu Guide Image ModeData imprinted at an Image mode setting of TV screen (640) may be diffi cult to read. Choose a setting of PC scre
97The Setup MenuMenu Guide BrightnessPress the multi selector up or down to increase or decrease the brightness of the monitor by moving the arrow to
98The Setup MenuMenu GuideSound Release LevelChoose the volume that will trigger the sound release ( 36) from 1 (relatively quiet sounds trigger sou
99The Setup MenuMenu GuideMemory Card FormatMemory card format formats memory cards for use in the camera. Note that formatting memory cards permanen
1IntroductionThank you for your purchase of a Nikon COOLPIX 3700 digital camera. This manual has been written to help you enjoy taking pictures with
100The Setup MenuMenu GuideChoosing Reset also clears the currentfi le number (23) from memory. Numbering will continue from the lowest number availa
101The Setup MenuMenu GuideFirmware VersionSelect this option to display the current camera fi rm-ware version. Press the multi selector to the left t
102Technical NotesTechnical NotesAt the time of writing, the following optional accessories were available for your Nikon digital camera. Contact you
103Technical NotesCaring for Your CameraTo ensure continued enjoyment of your Nikon product, observe the following precautions when storing or using t
104Technical NotesCleaning Lens/ Viewfi nderOne key to preserving the condition of these glass parts is to not touch them with your fi ngers. Remove du
105Technical NotesStorageTurn the camera off when not in use and check that the power-on lamp is off before putting the camera away. To prevent mold
106Technical Notes The following table lists the error messages and other warnings that appear in the monitor and how to deal with them.Display Proble
107Technical NotesDisplay Problem SolutionOUT OF MEMORY Camera in shooting mode: Insuffi cient memory to re-cord pictures at current settings.• Choose
108Technical NotesDisplay Problem SolutionMONITOR OFFMonitor has been left on for extended period, activating internal circuit protection.Use viewfi nd
109Technical NotesDisplay Problem SolutionCARD CONTAINSNO IMAGESNo pictures on memory card.Press button to return to shooting mode.21ALL IMAGES ARE
Introduction2ZOOMNIKKOR5.8-16.2mm1:.8-4.9Parts of the CameraMicrophone( 36, 39, 43, 55)Lens( 104, 113) Power switch( 7)Eyelet for camera strap Built
110Technical NotesIf your camera fails to function as expected, check the list of common prob-lems below before consulting your retailer or Nikon repr
111Technical NotesProblem SolutionNo picture is taken when shutter-release button is pressed• Camera is in playback or mode.• Batteries are exhausted
112Technical NotesProblem Solution Flash does not fi re• Flash is off. Flash turns off automatically when:◆ Landscape, Sunset, Night landscape, Mus
113Technical NotesSpecifi cationsType E3700 digital cameraEffective pixels 3.2 millionCCD12.7˝ high-density CCD; total pixels: 3.34 millionImage size (
114Technical Notes Design Rule for Camera File System (DCF)Your camera conforms to the Design Rule for Camera File System (DCF), a standard widely u
115Technical NotesSymbols (auto) mode, 6, 14 (delete) button, 22, 42, 49, 52 lamp, see Lamp, red ( ) (menu) button, 69, 80 (monitor) button, 17 (movie
116Technical NotesNNikon View, 57NTSC, see Video modeNumber of exposures remain-ing, 14, 70OOn/off, see Power switchPPAL, see Video modePic. enhance m
Printed in JapanSB3K00100401(11)6MAA9011-ANo reproduction in any form of this manual, in whole or in part (except for brief quotation in criti
Introduction3 Red ( ) lamp ( 18) Green (AF) lamp ( 18) Monitor ( 4, 5)Tripod socket Zoom buttons( 16) (monitor) button( 17)Viewfi nder( 16, 17)USB (
Introduction4The MonitorShootingThe following indicators appear in the monitor during shooting:1.01.0171734567891012131416 15171819202122231112 1 Sho
Introduction5 1 Current folder ... 23 2 File number and type ... 23 3 Battery level indicator1... 15 4
Introduction6To select a mode, align the mode icon with the “ ” mark next to the mode dial.The Mode Dial Movie ( 43)Choose from eight movie modes.
Introduction7The Shutter-Release ButtonYour camera has a two stage shutter-release button. The camera sets focus and exposure when the button is pre
8First StepsFirst StepsInserting BatteriesYour camera uses either of the following batteries:Battery DescriptionNon-rechargeable CP1 lithium batterie
9First Steps Replacing BatteriesTurn the camera off before removing or inserting batteries. Do not open the memory card slot / battery-chamber cov-e
Trademark InformationApple, the Apple logo, Macintosh, Mac OS, Power Macintosh, PowerBook, and QuickTime are registered trademarks of Apple Computer,
10First StepsInserting Memory CardsYour Nikon digital camera stores pictures on Secure Digital (SD) memory cards. No other cards can be used. For in
11First Steps Formatting Memory CardsThe memory card supplied with your camera is formatted at shipment. Other memory cards must be formatted before
12First StepsBasic SetupThe fi rst time the camera is turned on, a language-selection dialog will be displayed in the monitor. Follow the steps below
13First Steps The Clock BatteryWhen the main battery is installed or an AC adapter is connected, the clock battery will charge in about 10 hours. Whe
14Basic PhotographyBasic PhotographyStep 1 —Select ModeThis section details the basic steps involved in taking pictures in (auto) mode. In this
15Basic Photography The Battery IndicatorThe red () and green (AF) lamps will blink when the “battery exhausted” warning is displayed. “Out of Memory”
16Basic Photography Step 2 — Frame the Picture1 Ready the cameraHold the camera steadily in both hands. Photo-graphs can be framed in the monito
17Basic Photography Digital ZoomIn digital zoom, data from the camera’s image sensor are processed digitally, enlarging the center portion of the pict
18Basic PhotographyStep 3 — Focus and Shoot1 FocusPress the shutter-release button halfway to set fo-cus and exposure ( 7). In mode, the camera
19Basic Photography During RecordingWhile pictures are being recorded to the memory card, the green (AF) lamp will blink and a ( recording) or ( w
iFor Your SafetyTo prevent damage to your Nikon product or injury to yourself or to others, read the following safety precautions in their entirety b
20Basic PhotographyAF/AE LockFocus and exposure lock when the shutter-release button is pressed halfway, and re-main locked while the shutter-release
21Basic PhotographyStep 4 — View the Results1 Press the buttonA picture will be displayed in the monitor.1/ 400010001.JPGJPG100100N I KON121220
22Basic PhotographyDeleting Unwanted PicturesTo delete the picture currently displayed in the monitor: Erase 1 image?Erase 1 image?YesNo1Confi rmatio
23Basic Photography Image File and Folder NamesOn the memory card, pictures are identifi ed by fi le names with three parts: a four letter identifi er, a
24Scene ModeScene Mode Taking Pictures in Scene Mode (scene) mode offers a menu of fi fteen “scenes,” each corresponding to a common situation, such a
25Scene ModeManual ( 79) Scene ModeDepending on your subject, scene mode may not always produce the desired results. If results are not satisfactory
26Scene ModeManual ( 79) Noise Reduction“ Noise” in the form of randomly-spaced, brightly-colored pixels tends to appear in pictures taken at slow s
27Scene Mode✭ ✭Off Fireworks showSlow shutter speeds are used to capture the expanding burst of light from a fi rework.• Focus is fi xed at infi nity. A
28Scene ModeManual ( 79)✭OnAuto* Close upUse to capture vivid colors in close-up shots of fl owers, insects, and other small objects, with the backgro
29Scene ModeOff‡✭Off Dusk/DawnPreserves the colors seen in the weak natural light before sunrise or after sunset.• Noise reduction ( 26) turns on aut
ii• Do not immerse in or expose to water.• Do not transport or store with metal objects such as necklaces or hairpins.• Batteries are prone to leakage
30Scene Mode Taking Pictures for a Panorama Panorama AssistThe pan direction, fl ash mode, macro close-up mode, and exposure compensation can not be
31Scene Mode6Compose next shot to overlap with previous picture.7Take next shot. Repeat steps 6–7 until all shots in series have been taken.8End seri
32More on PhotographyMore on PhotographyThe following fl ash modes are available: Using the Flash: Flash ModeMode How it worksAnytime Flash( fi ll fl a
33More on Photography Sensitivity ( ISO Equivalency)When lighting is poor and the fl ash is off, the camera will automatically increase sensitivity, p
34More on Photography Release Mode: Self-Timer and Sound ReleaseThe following release modes are available:Mode How it worksSound releaseShutter relea
35More on Photography5Start timer. Press once for delay of about 10 s, twice for delay of about 3 s. Count-down timer in monitor shows number of sec
36More on Photography Using Sound Release11717Display release-mode menu.2Highlight .17173Exit menu (to exit without changing mode, wait two seconds).
37More on PhotographyMacro close-up mode is used for taking close-up shots of small objects at very short distances (minimum 4cm/1.6˝). Easy Close-u
38More on PhotographyExposure compensation is used to alter exposure from the value suggested by the camera. Exposure compensation can be set to valu
39More on PhotographyVOICE RECORDINGVOICE RECORDINGMax rec time05 : 00 : 002003.10 . 31 13 : 00Voice recordings up to fi ve hours long can be recorde
iiiE3700Notice for customers in the U.S.A.Federal Communications Commission (FCC) Radio Frequency Interference StatementThis equipment has been tested
40More on Photography Making a Voice RecordingSound can not be recorded when less than ten seconds of recording time remain on the memory card or the
41More on PhotographySELECT SOUND FILESELECT SOUND FILEStart Delete004 2003. 11 . 03 09 : 15003 2003. 11 . 02 20 : 05002 2003. 10 . 31 14 : 30001
42More on PhotographyThe controls at the top of the voice recording playback screen can be used during playback. Press the multi selector left or rig
43MoviesMovies Choosing a Movie ModeThe camera can record the following types of movie. All movies except time-lapse movies include sound recorded v
44MoviesTo select a movie mode:149sSelect mode.2/2/3MOVIE OPTIONSMOVIE OPTIONSSmall size 320B/W movie 320Smaller size 1604Display MOVIE OPTIONS me
45MoviesOption DescriptionSingle AFCamera focuses when shutter-release button is pressed halfway. Focus locks when focus operation is complete.Contin
46MoviesRecording Movies MoviesDepending on the make of memory card used, recording may end before the memory card is full ( 43). Time-lapse movies
47MoviesRecording a Time-Lapse MovieSelecting Time-lapse movie 640★ from the movie mode menu displays the menu shown in Step 1, below.SET INTERVAL T
48Movies Take Test ShotsTake a test shot and view the results before recording a time-lapse movie. Time-Lapse MoviesDepending on the make of memory ca
49MoviesIn full-frame playback, movies are indicated by a icon and can be viewed by pressing the center of the multi selector. Playback controls ar
ivNotice for customers in CanadaCAUTIONThis class B digital apparatus meets all re-quirements of the Canadian Interference Causing Equipment Regulatio
50MoviesEditing MoviesTo cut the beginning or end from a movie, press the button while a movie is displayed in playback mode.Select Begin trimSelect
51Movies25s25sYesNoReview movieSave trimmed movie?Save trimmed movie?(Replace orig movie?)(Replace orig movie?)DoneYesNoReview movieSave trimmed movie
52More on PlaybackMore on PlaybackViewing Multiple Pictures: Thumbnail PlaybackPressing the (W) button in full-frame playback displays the pictures
53More on PlaybackTaking a Closer Look: Playback ZoomUse the (T) button to zoom in on images displayed in full-frame playback ( 52).To Description
54More on Playback* To exit without creating copy, highlight No and press center of multi selector.Cropped pictures are stored as JPEG fi les (compress
55More on PlaybackVoice Memos: Recording and PlaybackA voice memo can be recorded and appended to any picture marked with a (voice memo record-ing
56More on Playback Viewing Pictures on TVThe EG-CP14 audio / video (A / V) cable included with the camera can be used to connect the camera to a
57More on PlaybackUsing the UC-E6 USB cable and Nikon View software provided with your cam-era, you can view your photographs and movies on a computer
58More on PlaybackChoosing a USB OptionUSBUSBPTPMass Storage3Display USB menu.USBUSBPTPMass Storage4Highlight PTP or Mass Storage.SET-UPSET-UP1/51/5
59More on PlaybackUC-E6 USB cableConnecting the USB CableTurn the computer on and wait for it to start up. After confi rming that the camera is off,
v Use Only Nikon Brand Electronic AccessoriesNikon COOLPIX cameras are designed to the highest standards and include complex electronic circuitry. On
60More on PlaybackMac OS XDrag the “NO_NAME” camera volume into the Trash.Mac OS 9Drag the “untitled” camera volume into the Trash.Disconnecting the C
61More on PlaybackPrinting PicturesTo print the pictures from the camera memory card:• select pictures for printing using the Print set option and tak
62More on PlaybackPrint SetThe Print set option in the playback menu is used to create digital “print or-ders” for devices that support DPOF ( 61).
63More on Playback Print SetIf the menu shown in Step 8 is displayed after a print order is created, the Date and Info options will be reset. “Date”If
64More on PlaybackPrinting Via Direct USB ConnectionIf the UC-E6 USB cable is used to connect the camera to a printer that sup-ports PictBridge or Eps
65More on PlaybackConnecting the USB CableAfter confi rming that the camera is off, connect the UC-E6 USB cable as shown below.Turn the camera and pri
66More on PlaybackPrinting PicturesTo print selected pictures:PictBridgePictBridgePrintDPOF printingCancel1Highlight Print.PRINTPRINTPrint selectionPr
67More on PlaybackUSB Direct: If the dialog shown at right is displayed, an error has occurred. Check the printer and resolve any problems as directe
68More on PlaybackTo print the current print order:Printer ready?Printer ready?CancelStart printConfirm006DPOF PRINTINGDPOF PRINTINGprintsprints3Highl
69The Shooting MenuMenu GuideMenu GuideIn (manual) and (auto) modes, the following settings can be adjusted from the shooting menu:The Shooting M
viTable of ContentsFor Your Safety... iNotices...
70The Shooting MenuMenu GuideImage Mode ( and )Pictures taken with a digital camera are recorded as im-age fi les. The size of the fi les, and with i
71The Shooting MenuMenu Guide Memory Card Capacity and Image ModeThe fi gure shown in the monitor for the number of exposures remaining is only an appr
72The Shooting MenuMenu Guide White Balance ( Only)The color of the light refl ected from an object varies with the color of the light source. The h
73The Shooting MenuMenu Guide Preset White BalancePreset white balance is used when shooting under mixed lighting or to compensate for light sources
74The Shooting MenuMenu Guide Restrictions on Camera SettingsThe fl ash turns off automatically at settings of Continuous H, Continuous L, and Multi-s
75The Shooting MenuMenu Guide Interval Timer PhotographyTo display the menu shown in Step 1, below, highlight Intvl timer shooting in the CONTINUOUS m
76The Shooting MenuMenu Guide During RecordingTo save power, the monitor turns off between shots; the green (AF) lamp blinks to show that recording is
77The Shooting MenuMenu Guide Best Shot Selector ( Only)When the “Best Shot Selector” (BSS) is on, the camera takes pictures as long as the shutter-
78The Shooting MenuMenu Guide Image Sharpening ( Only)The camera automatically processes pictures to empha-size the borders between light and dark a
79The Shooting MenuMenu Guide AF Area Mode ( Only)In (auto) mode (and at some scene-mode settings), the camera automatically focuses on the subjec
viiMovies 43 Choosing a Movie Mode ... 43Recording Movies...
80The Playback MenuMenu GuideThe Playback MenuThe playback menu contains the following options:To exit the menu and return to playback mode, press the
81The Playback MenuMenu Guide Slide ShowThis option is used to play pictures back in an auto-mated “slide show” with about three seconds between ea
82The Playback MenuMenu Guide Viewing Chosen Images in the Order SelectedSLIDE SHOWSLIDE SHOWSelect allSelect image(s)1Highlight Selected image(s).2
83The Playback MenuMenu GuideThe following operations can be performed during the show: Auto OffThe camera will enter standby mode if no operations ar
84The Playback MenuMenu Guide DeleteThe delete menu contains the following options: Deleting Selected PicturesDELETEDELETEErase selected imagesErase
85The Playback MenuMenu Guide Before DeletionOnce deleted, pictures can not be recovered. If desired, transfer pictures to a com-puter before deletio
86The Playback MenuMenu Guide ProtectThis option is used to protect pictures from accidental deletion. Protected fi les can not be deleted by press
87The Playback MenuMenu Guide Restrictions on Auto TransferNo more than 999 pictures can be transferred using Auto transfer. To transfer more than 99
88The Playback MenuMenu Guide Marking Selected Pictures for TransferDone6Complete operation.5Repeat steps 3–4 to select ad-ditional pictures. To dese
89The Playback MenuMenu GuidePIC. ENHANCE MENUPIC. ENHANCE MENUHalo filterMonochrome filterSepia filter Pic. Enhance MenuTo create an enhanced copy of
Related products and manuals for Cameras Nikon 3700
 (182 pages)
 (2 pages) (125 pages)
(204 pages)
(139 pages)
(232 pages)
(244 pages)
(244 pages)
(139 pages)
(252 pages)
(136 pages)
(178 pages)
(228 pages)
(2 pages) (125 pages)
(204 pages)
(139 pages)
(232 pages)
(244 pages)
(244 pages)
(139 pages)
(252 pages)
(136 pages)
(178 pages)
(228 pages)
 (144 pages)
(170 pages)
(196 pages)
(176 pages)
(472 pages)
(107 pages)
(144 pages)
(170 pages)
(196 pages)
(176 pages)
(472 pages)
(107 pages)
© 2020, manymanuals.com. All rights reserved. | 0.074 s |
 Manymanuals.com
 Manymanuals.de
 Manymanuals.fr
 Manymanuals.it
 Manymanuals.pl
 Manymanuals.cz
 Manymanuals.es
 Manymanuals-pt.com
Comments to this Manuals